

REST API Testing: A Comprehensive How-to Guide

Understanding REST APIs
REST APIs, or Representational State Transfer APIs, have become the standard for building web services due to their simplicity and scalability. They allow different software applications to communicate and exchange data seamlessly, and understanding the fundamentals of REST APIs is crucial to ensure successful testing.
This guide will cover everything you need to know to perform thorough API testing and achieve your desired results.
What tests should I perform on a REST API?
Effective API testing is essential to guarantee the reliability, functionality, and security of your applications. By thoroughly testing your REST APIs, you can identify and resolve issues such as incorrect responses, broken endpoints, and vulnerabilities. This ensures a seamless experience for your users and helps maintain the integrity of your systems. We now find ourselves in the era of microservices, where traditional monolithic services are giving way to a new architectural approach. With the rising number of these services, testing becomes a major concern. How does one approach unit testing for a resource in a REST API? And what about conducting integration tests for microservices? These are common questions that developers grapple with, making the testing process quite challenging. To alleviate some of these challenges, we are here to provide developers with practical frameworks, tools, and valuable tips for effectively conducting these tests.
When devising test scenarios for an API, we need to have a thorough understanding of its contract. Documentation tools like Swagger are invaluable in such situations, as they provide comprehensive insights into the API's features, message body, and more. By leveraging Swagger documentation, developers can gain a deeper understanding of the API's structure and ensure accurate and effective testing.
When preparing for a test let’s gather the necessary data, including:
Request Data:
- Method
- URI
- Headers
- Query Parameters
- Body
Response Data:
- Headers
- Body
- Status code
Request behavior:
- Validating the returned data.
- Verifying the response headers.
- Validating if the response is in accordance with expected behavior.
- Verifying that while the content type may change, the overall behavior remains consistent.
- Validating the structure of JSON or XML.
- In the case of errors, ensure that the status code aligns with the appropriate error codes.
- Handling requests with incomplete information and validating the expected behavior.
By thoroughly collecting and analyzing this data we gain a better understanding of the expected behaviors within our API.
REST API Testing Tools
Once you have surveyed the key aspects to be tested in an API, the next crucial step is selecting the appropriate testing tool. The market provides a wide range of options, but it's important to choose the tool that aligns best with your project's specific requirements and scenario. To illustrate, here are a few testing tools to consider:
In this article, we will utilize Postman for creating the tests and Newman for automating their execution. By leveraging these tools, we can establish a highly effective testing setup and create an interesting scenario for comprehensive testing.
Postman / Newman
Postman is a popular REST Client tool developers trust for making HTTP requests, enabling seamless validation of tests, and Newman serves as a tool that can run Postman collections by command line. This seamless integration allows for efficient API validation following the generation of a build, streamlining the process and ensuring the quality of our testing.
Rest API Test Scenario
To demonstrate the user-friendly nature of Postman, we will provide a step-by-step guide on how to test the API. This API is designed with simplicity in mind, it is a Task CRUD, where we will find the following features:
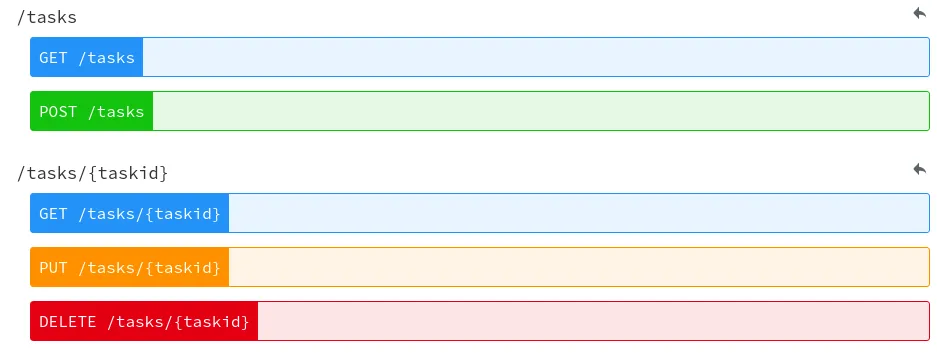
Our plan will be as follows:
Rule Expected result
POST /tasks with missing values return invalid request status HTTP Status 400
POST /tasks when running return creation status and with location in the header HTTP Status 201, Location no header
GET /tasks when running return ok status HTTP Status 200
GET /tasks/{taskid} with valid taskid return task object and ok status Task Object and HTTP status 200
GET /tasks{taskid} with invalid id return status of not found HTTP Status 404
DELETE /tasks/{taskid} with valid id return status of no content HTTP Status 204
Postman
Once the test scenario has been constructed, we can proceed with utilizing Postman for creating the test scenarios in REST API testing. At this stage, we have two options available: importing Swagger or creating a new collection from scratch.
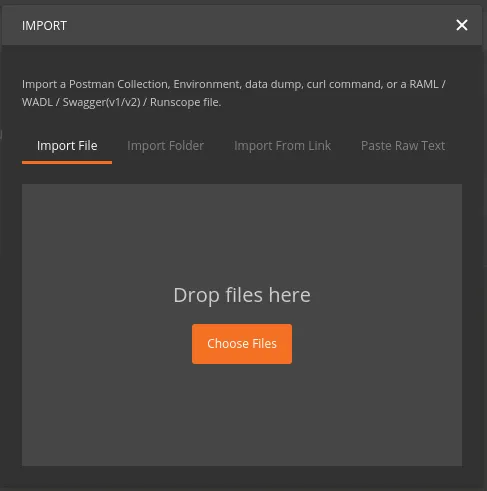
Import Swagger
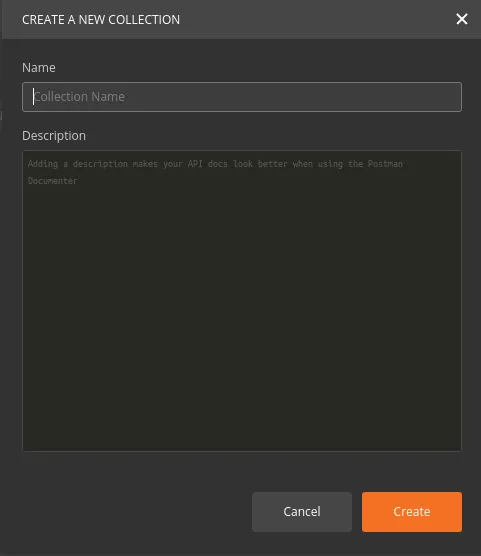
Create a new collection
To generate collections of test requests in Postman, there are two approaches. The first is to import a Swagger document, which automatically includes all the requests described in the Swagger documentation. Alternatively, you can create a new collection directly within the Postman tool. In this case, the collection will initially consist of empty requests, requiring the developer to provide the necessary details and descriptions for each request within the collection.
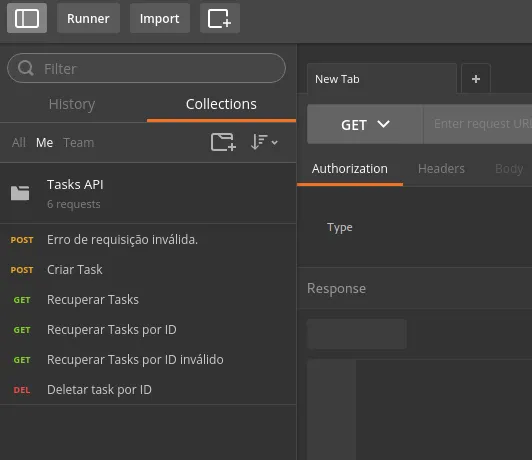
Once the requests for testing have been defined, we can create a collection in Postman specifically for these requests. This collection serves as a convenient container for organizing and executing the tests effectively.
Postman offers the flexibility to work with multiple environments, such as Production or Sandbox. Within each environment, variables can be utilized to assist in the testing process. A good example is the insertion of the API endpoint.
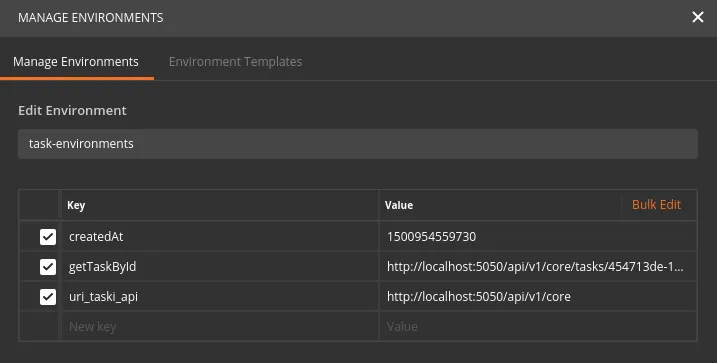
Environment Configuration.
In Postman, you can select the appropriate HTTP method (POST, GET, PUT, DELETE, etc.) and enter the request URL. It's worth noting that the URL, denoted as {{uri_task_api}}, is an environment variable. This allows for seamless testing across multiple environments, as the variable can be easily updated to target different endpoints as needed.

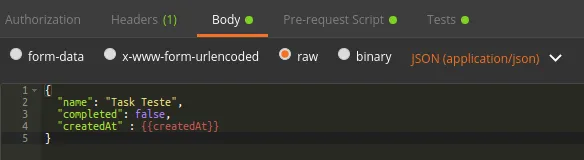
Add the necessary Headers, in this case, we have to run the "Content-Type" Header to specify that we will run a JSON, but we could run a different Header to test if the API is handling the "media type" error correctly.

When carrying out a data inclusion or editing operation, we should fill in the body. This is an example of a body using JSON. Besides JSON, we can use XML, text, form-data, x-www-form-urlencoded or binary files.
In the "Pre-request Script" tab it's possible to run scripts before making a request, in this image, we are creating a "createdAt" variable with the current date, and adding it in an environment, so we can use this value anywhere in the request.

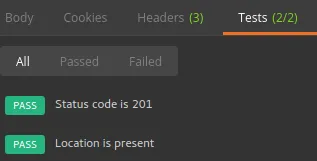
The "Tests" tab is where we should create the scripts to validate the test scenario, validate if a status code is according to plan, and if the Header "location" is present, among other possibilities. We can also retrieve values to be used in the future, i.e. we can perform several scripts, depending on your needs.

Running the Tests
Once all the scenarios have been created, we have the option to execute the test either individually or for the entire collection. When performing a unit test, simply click the button below:

Clicking this button will trigger your request, validating the tests and providing us with information on which tests have passed or failed.
To run the collection let’s navigate to the "Runner" menu. This will open a window where we need to select the desired collection and the corresponding "Environment". Once we have made our selections, simply click the button below to initiate the execution:

This will initiate the execution of all programmed requests within the collection, and inform us which tests have passed or failed once the execution is complete.
Newman
As mentioned previously, Newman is a command-line tool that allows us to execute our Postman collections. This feature proves beneficial when we intend to integrate tests as a step within your build process. To utilize Newman, follow these steps:
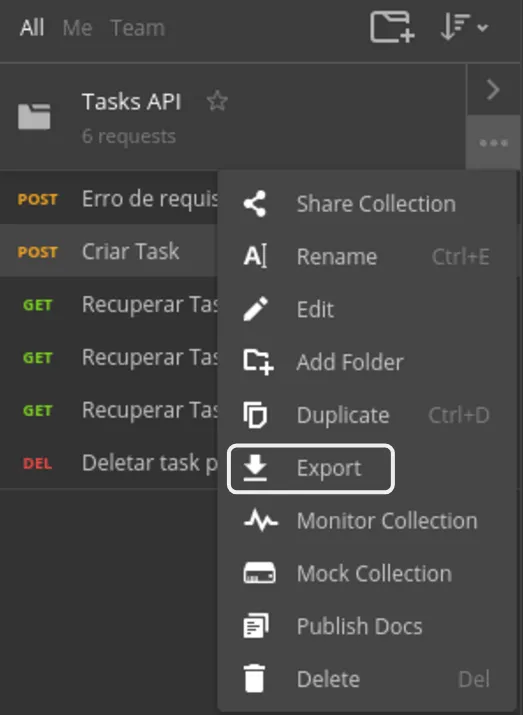
Export collection:
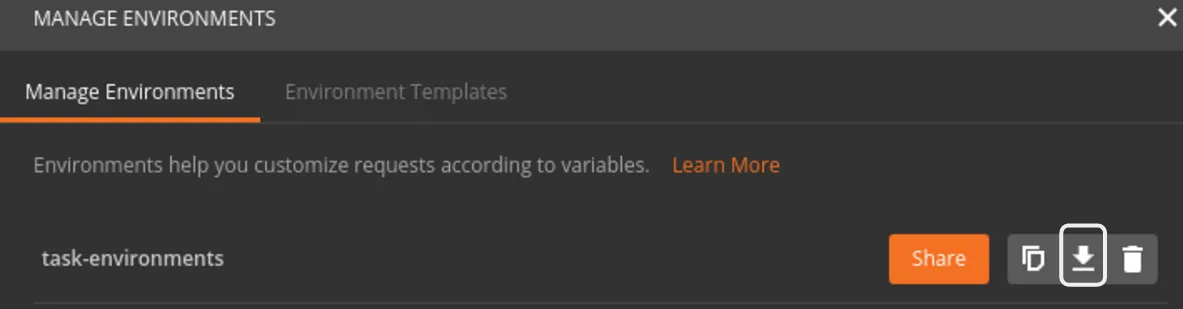
Export environment:
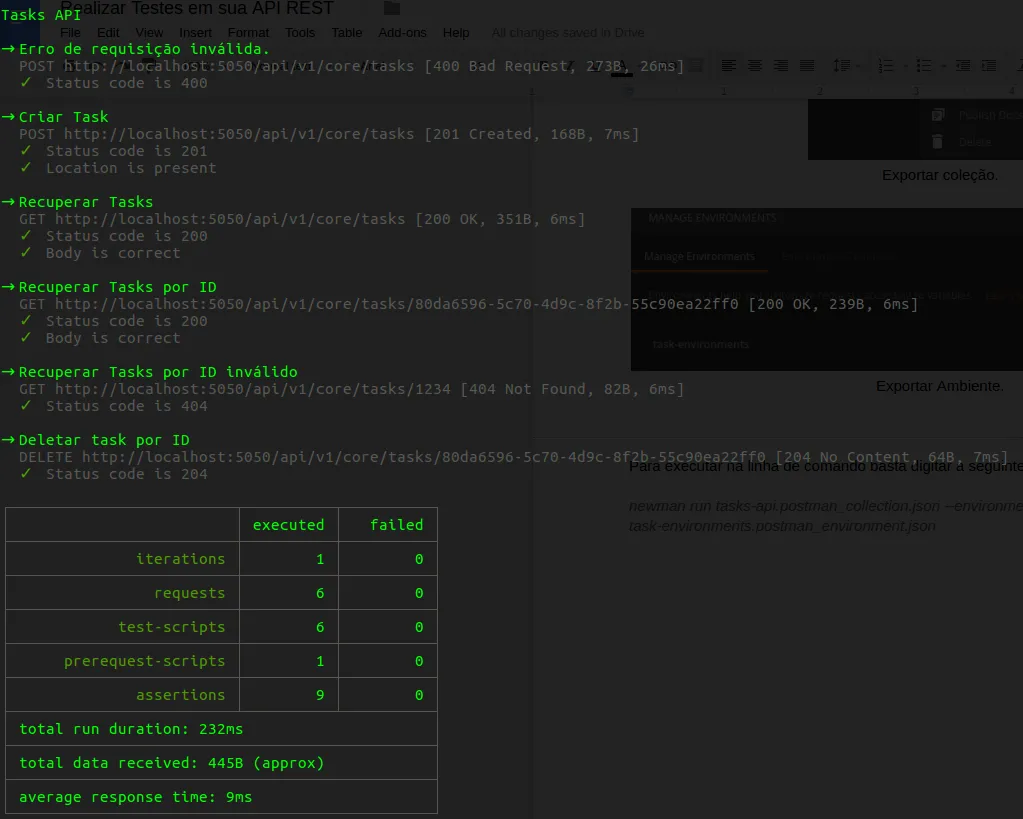
To run the command line, simply type the following:
newman run tasks-api.postman_collection.json --environment task-
environments.postman_environment.json
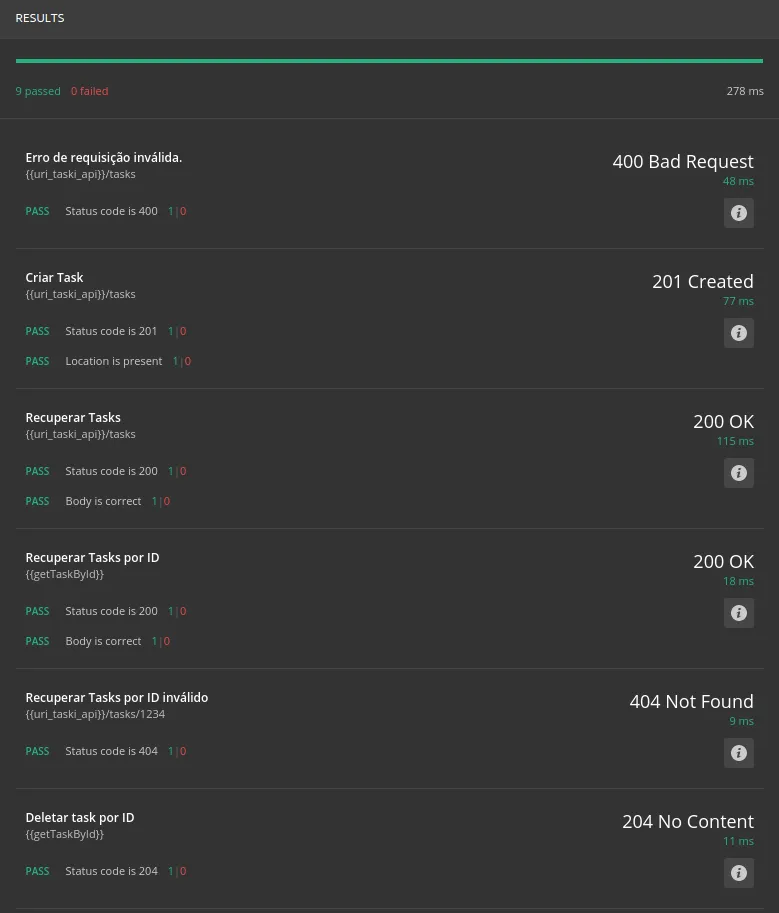
After running, Newman will present the test results, indicating the tests that were performed and clearly distinguishing between passed and failed tests.
This is just one approach to testing your API. Keep in mind that there are various tools and methods available, and it's essential to assess what works best for your specific context. Regardless of the approach you choose, always ensure that your APIs are thoroughly tested and not left untested!
GITHUB: https://github.com/renanpetronilho/task-api
Our API Management Platform serves as a comprehensive tech hub for organizations. It enables companies to scale their operations effectively by providing essential features such as APIs, test environments, adaptive governance, API security, and a range of other integration solutions. With Sensedia, companies can streamline their API management processes and leverage the platform's comprehensive set of tools and services.
This post was originally published in July 2017, with minor updates in 2019 and 2023.

Begin your API journey with Sensedia
Hop on our kombi bus and let us guide you on an exciting journey to unleash the full power of APIs and modern integrations.


.png)

Embrace an architecture that is agile, scalable, and integrated
Accelerate the delivery of your digital initiatives through less complex and more efficient APIs, microservices, and Integrations that drive your business forward.


